

Seating and Work Surfaces for Outdoor Learning
Seating and work surfaces are important aspects of an outdoor classroom because they help create practical and comfortable areas for instruction. Outdoor classroom seating and work areas can be permanent or moveable, depending on what will work best for the school program and students. Seating should meet physical distancing requirements, be arranged so that teachers can be heard, allow room to access each seat, and provide accessible space for students with special needs.
The information below frames seating options according to their level of cost, and includes low-cost and no-cost solutions, ideas for low-cost portable seating, solutions that require moderate investments, and ideas that require larger capital investments to create permanent infrastructure.
© Green Schoolyards America, Farmers Branch, Texas

© Green Schoolyards America, Portland, Oregon

© Golestan Education, El Cerrito, California

© Out Teach, Dallas, Texas

© Nancy Striniste, EarlySpace, Arlington, Virginia
Low-Cost and No-Cost Solutions
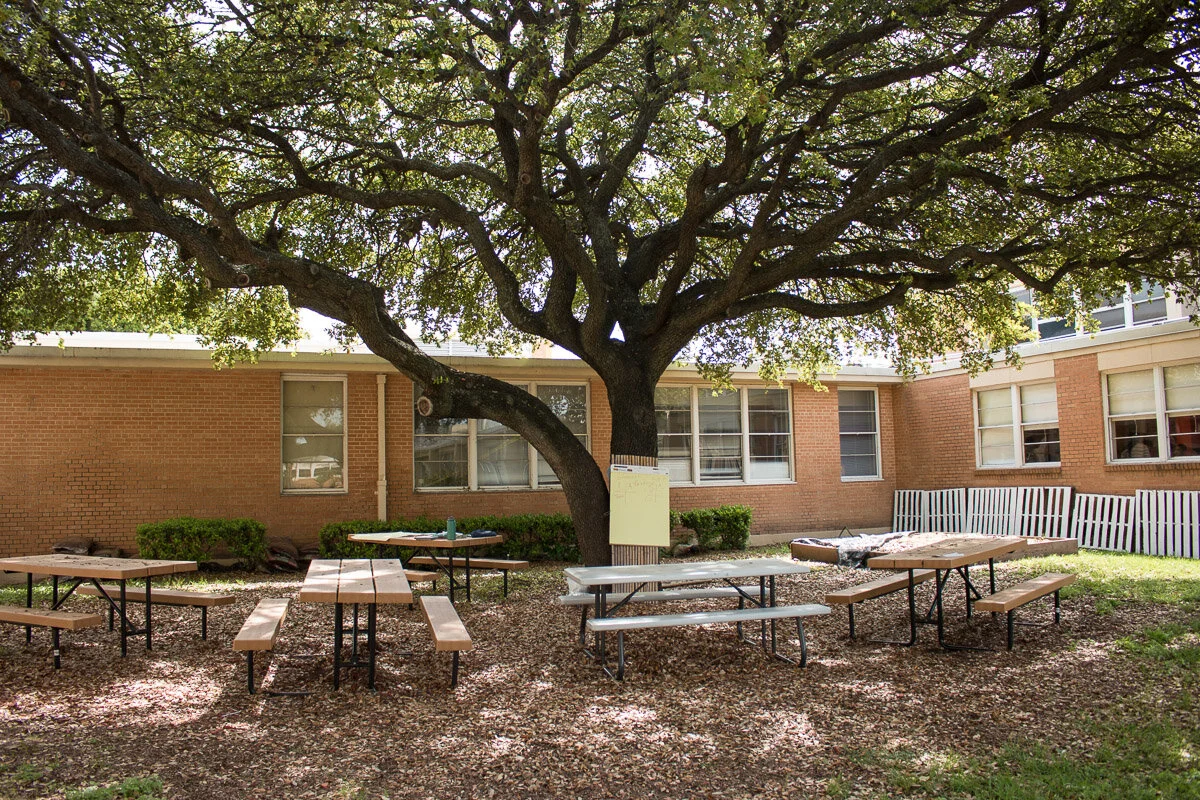
Use existing seating. Many campuses have existing seating areas such as lawns, picnic tables, bleachers, built-in amphitheaters, and concrete walls. This seating can be easily adapted to accommodate physical distancing.
Reconfigure existing seating. Gather existing picnic tables or other types of seating already on campus and move them to a central location to organize them as classroom(s) that incorporate physical distancing.
Add straw bales. Straw bales are approximately 36 inches long and 18 inches wide and, to accommodate physical distancing, can seat one student each. If allergies, scratchy surfaces, or insects are a concern, assign each student a large rectangle of outdoor fabric to lay over the bale, or give each student their own seat cushion to place on the bale.
If straw bales are exposed to rain or damp weather, they can harbor mold and will decompose quickly. This can be a concern for students and staff, particularly those with allergies or asthma, so it is recommended that straw bales be used in locations with dry climates, and/or be covered when not in use, stored under covered areas, or be repurposed in school gardens when they begin to break down. If available, bales made from rice straw may last longer than those made from wheat straw. Students or staff with severe allergies should use an alternative form of seating.
Note: “Hay” bales and “straw” bales are not the same thing. “Hay” bales are made from the top section of stalks of wheat and other grains, and is typically used as animal feed. Do not purchase hay bales for school environments! They will sprout with the first moisture they receive and do not last long. “Straw” bales are made from the lower section of the same plant stalks and do not include seeds. This material is sometimes used for farm animal bedding and garden mulch, and is a byproduct of the agricultural industry.
Find logs and stumps. Local arborists and park managers who remove trees that fall after a storm, often have access to logs that can be repurposed as seating for outdoor learning. Wooden logs that are rot-free and untreated can be used for seating in their rustic form (as you might receive them from an arborist), or they may be cut into shorter stumps. Bark can stay on or be removed to extend the life of the log. Avoid using logs that come from trees with sticky sap, such as pine, or trees that have had insect infestations that produce sticky honeydew on their surfaces. For short-term use, logs from any type of tree that is not sticky will do. For long-term use, some of the most rot-resistant choices are cedar, redwood, eucalyptus, cypress, or locust (availability varies by region). Click here for an example of a stump request form used by San Francisco Unified School District to explain the type of logs they would like for outdoor learning.
Horizontal logs. Use logs that are 14 to 18 inches in diameter. Logs that are 8 feet long allow will allow one student to sit at each end of the log with 6 feet of space in between them. For a more comfortable seat, mill or chainsaw the top of the log to create a flat surface at least 1 foot wide. Place the logs into a shallow trench filled with gravel for stability and to improve the drainage and prevent rot.
Stumps. To create stumps from logs, use logs that are at least 14 to 21 inches in diameter. Cut each log into sections that are 12 to 16 inches long. Cut the stumps carefully so that the seats will be level when the stumps are resting on one of the cut surfaces. Sand the tops and round the edges for comfort and to reduce splinters.
Stump seats with backrests. To create seats with backrests, cut the logs into longer segments adding 10 to 14 inches for the backrest, and carve the backrest with a chainsaw operated by an experienced professional. The resulting stump seats should be wider than they are tall for stability and so that they can be set on any flat surface (e.g., lawn, pavement, mulch). For added stability with taller or narrower stump seats, place them into a trench filled with gravel and bury the bottom portion of the log at least 8 inches or half the height of the whole seat.
Low-Cost Portable Solutions
Move indoor furniture outdoors. Classroom desks, tables, and chairs can be moved outdoors for an individual instructional period or day. Most indoor furniture will need to be moved back inside at the end of each day unless it is placed in a sheltered location. If furniture is moved daily, use strategies to ensure physical distancing while transporting the furniture and limit the number of people that are indoors at any time. To avoid having to move furniture back and forth every day, consider repurposing older furniture or purchasing low-cost outdoor options.
Purchase outdoor seating. There are many types of low-cost outdoor chairs, stools, and cushions available on the market, such as lawn, beach, and camping chairs. There are many types of seating available, such as folding seating, adjustable seating, seating with back rests, and seating with sunshade attachments or cup holders for supplies. One type of handy accessory is the Seat Sack® chair pouch. These pouches can be placed on the backs of chairs to hold folders, notebooks, and papers.
Make “sit-upons.” These waterproof cushions were devised by Girl Scouts to protect themselves from cold and wet surfaces when sitting on the ground, logs, rocks, and so on. Students can make sit-upons with guidance from staff, or volunteers can make them to support a school’s outdoor learning program.
Use picnic blankets. Blankets are a comfortable option for short periods of outdoor instruction. Each student should be supplied with their own blanket to reduce sharing materials.
Purchase mats. Small mats made from plastic or rubber are easy to clean between uses. Examples include kindergarten mats, yoga mats cut in half, stadium cushions, or rubber play tiles. Cloth cushions, carpet pieces, and cardboard tiles can also be used but are more difficult to wipe down, so it may be better to give each student their own mat to use. (Write each child’s name on their personal mat.)
Buy crates and 5-gallon buckets. Plastic crates or 5-gallon buckets with lids are very portable and make durable, movable seats. They can double as both seating and a vessel to carry supplies, making it easier to reduce the sharing of materials. If students will be sitting on them for an extended period of time, we recommend adding some form of cushion to the top of the inverted crate or bucket.
Mark seating areas. Use sidewalk chalk to mark seating areas on hard surfaces, such as asphalt on the playground. Use any of the above portable seats to make those spaces more comfortable for extended lessons.

© Green Schoolyards America, at Golestan Education, El Cerrito, California

© the Waldorf School of Dupage, Warrenville, Illinois

© Portland Public Schools, Portland, Maine

© Green Schoolyards America, Hayward, California

© the Waldorf School of DuPage, Warrenville, Illinois
© Green Schoolyards America, Arlington, Virginia
Moderate Investment Solutions
Purchase or build picnic tables. Picnic table design and size varies greatly. Designs can include bench seating on two sides of a table, one bench whose back folds down into a table, or tables in the shape of a square, hexagon, or circle with a continuous bench running around the entire table. In addition, benches can be attached or detached. If picnic tables will be used for instruction, use tables with solid, rather than perforated or slatted, tops to allow students to write more easily.
To seat students in accordance with CDC guidelines, seat one student at each of two opposite corners of a 6- to 8-foot table, either on the same or opposite sides. Picnic tables can be purchased from local suppliers, or they can be built by career tech education (CTE) or construction classes at local high schools (when in session), by school district facilities departments (if they have a shop and staff to do so), by neighborhood volunteers, or by college or community service organizations (e.g., scouts).
The Waldorf School of DuPage in Warrenville, Illinois built small portable desks, similar to “personal picnic tables” for each student, and made them in three sizes (left). See our case study page for more information and their wonderful video for desk-building directions.
Build benches. There are many simple designs for benched that can be used outdoors. Generally it is important for stability that the base of a bench is wider than the top, or that the bench be secured to the ground. Benches can be built from recycled materials and from untreated lumber cut from weatherproof woods such as cedar or redwood. Benches can be secured with concrete footings or similar techniques in order to minimize protrusions and vandalism.
Note: Do not use pressure treated lumber since many types contain poisonous chemicals that may be transferred to children’s hands when they touch the wood.
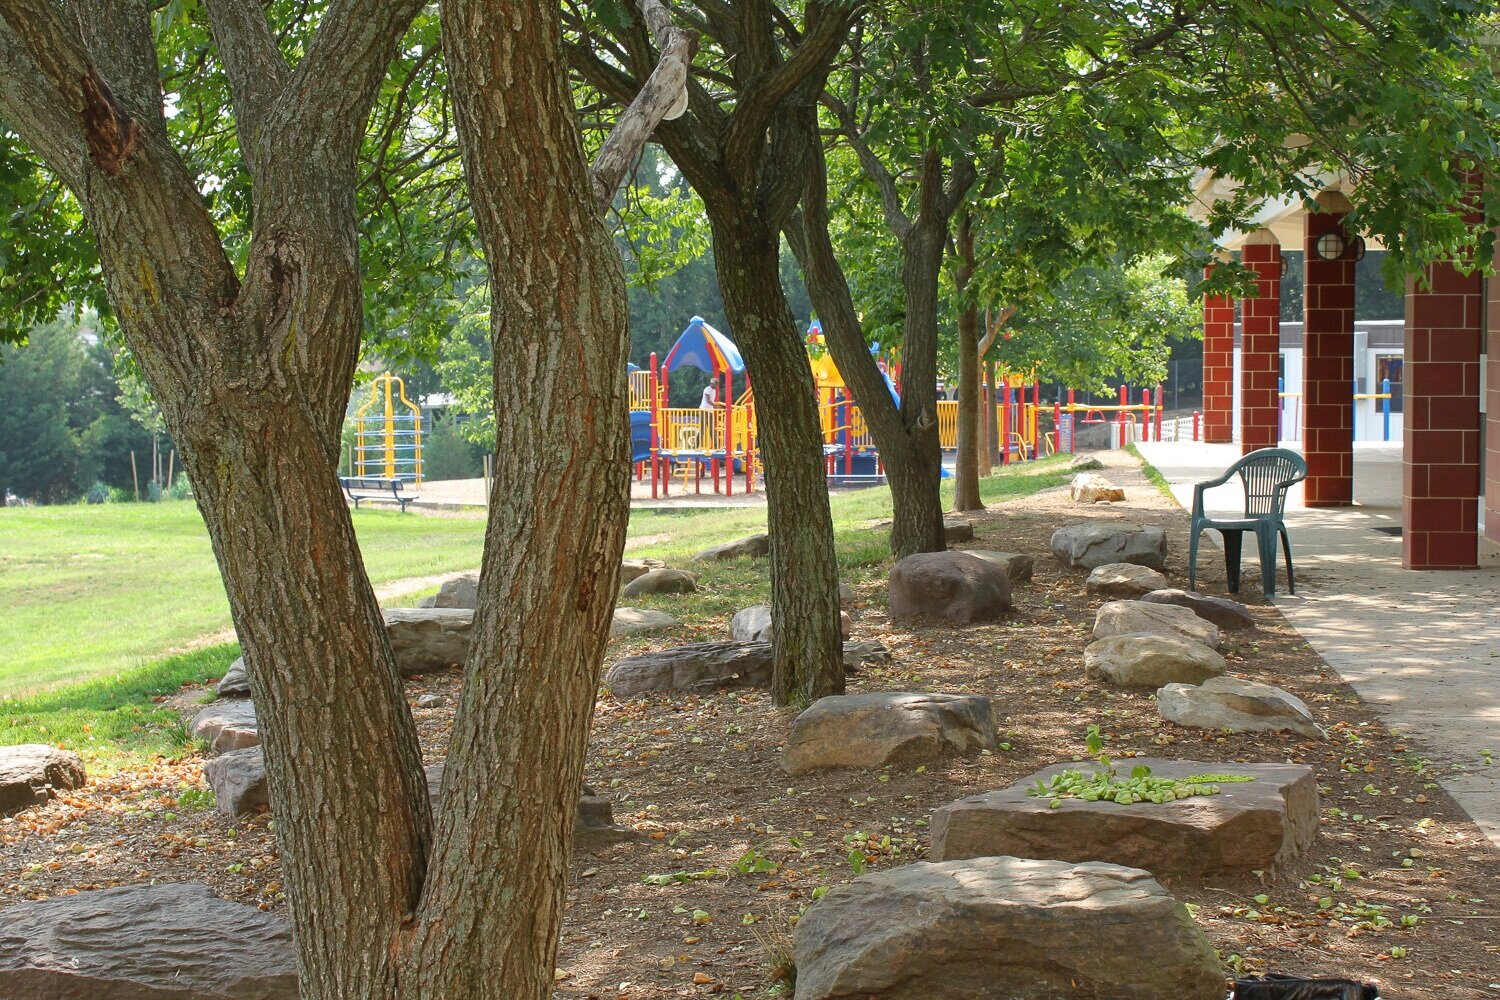
Add rocks and boulders. Stones make attractive, interesting, and long-lasting outdoor seating. Schools can partner with local quarries or businesses that sell stone to find boulders that meets bench height requirements for students. Locally sourced native types of stone may be less expensive since the transportation distance is shorter, and can be incorporated into the school’s curriculum through geology, geography, or history lessons. Avoid stones with sharp or uneven top surfaces, surfaces that allow water to pool, or that will become slippery when wet. Stone seating is not comfortable by itself for long periods and can be softened by adding portable seat cushions (discussed above).
Solutions that require larger Capital Investments
Install permanent outdoor benches and seats. Permanent seating can be artfully handmade or commercially produced from a variety of materials such as carved wood, mosaic on concrete, or metal. We recommend each school create a comprehensive schoolyard design, land management plan, and/or facilities master plan before investing substantially in permanent seating since it is difficult to move once installed.
Create council rings. These inviting outdoor gathering spaces are typically made from stone or wood benches arranged in a circle. They are a common form of outdoor seating in parts of the Midwest where landscape architect Jens Jensen popularized this seating type in the early and mid-1900s. Circular benches allow for conversation and collaboration, and traditionally symbolize that each person has equal value in the group.
Construct amphitheaters. Amphitheater seating can be built into existing or constructed slopes and surfaced with grass, inset logs, or benches made from stone or other materials. When designing on a slope, consider access and ensure that the amphitheater is compliant with the Americans with Disabilities Act.

© Green Schoolyards America, Design by EarlySpace LLC, Gaithersburg, Maryland

© Green Schoolyards America, Denver, Colorado
Key Issues to Keep in Mind
Physical Distancing
Seating should be spaced to provide 6 feet of distance between students. There are various ways to stagger student seating, whether the seating is existing or new. Configurations include circular or triangular layouts, grids, and amphitheater style seating. (See the Potential Outdoor Classroom Configurations chart for ideas.)
Seat students so they are within hearing distance of a teacher who is speaking at a comfortable level (i.e., a maximum of 25 feet), even when wearing a mask or face shield. (See Sound for more information.)
Some types of seating are ready for seating students individually (e.g., folding chairs, stumps) and so can be easily organized to accommodate physical distancing. Other types of seating will need to be adapted. For example, picnic table benches that may ordinarily seat three to four students should seat only one to two students during the pandemic, when students are seating 6 feet apart.

© Out Teach, Dallas, Texas

© Tahereh Sheerazie, Los Angeles, California
Safety and Comfort
Maintain access. Seating areas should not block emergency access for the fire department or in any way impede safety on a school campus.
Consider topography. Seating should be placed on a flat or gently sloped area. Avoid steep slopes to ensure that seating is easily accessible for everyone.
Reduce hazards. Ensure all materials used are nontoxic, have no sharp edges or protrusions, and are as durable as possible to withstand use during the school year.
Personalize supplies. To minimize health risks, assign portable seating to individual students and place student names on their supplies to reduce the sharing of materials. If some types of portable seating are shared (e.g., blankets, mats), clean them between uses.
Keep seating flexible. Consider active seating options that allow students to change position as needed and allow them to sit upright, recline, curl up, stretch out, or stand.
Use comfortable seats. Unpadded seating is comfortable enough for short periods of time. For longer periods, consider softer, padded seating and allowing time for movement breaks.
Provide work surfaces. In addition to seating, students may need work surfaces. These surfaces can be portable (e.g., clipboards, lap desks) or permanent (e.g., tables, individual desks).
Accessibility
School programs must provide seating for students with disabilities (e.g., students with vision or hearing impairments) and mobility challenges (e.g., students in wheelchairs). See Inclusive Design for Outdoor Spaces for ideas and advice. To be in compliance with ADA requirements, place seating areas on or adjacent to wheelchair accessible pathways and include space for wheelchair users. Provide seating options that include backrests or a surface to lean against for students for whom seating without back support creates a sense of vulnerability and restlessness or produces back strain.
Sustainability
As much as possible, use natural, renewable, or recycled materials to create seating, tabletops, and bases for work surfaces. Try to use recycled materials to reduce waste. Suitable recycled materials may include: logs and stumps, concrete blocks, concrete pipes, bricks, wooden cable reels, or wooden boards that have not been pressure treated. Be sure that all recycled materials used in children’s spaces are free of lead paint and have not been chemically treated.
Seek Local Partners and Donated Materials
Many local and state companies, organizations, and associations can help by donating, loaning, or selling particular types of materials.
Lumber and construction materials. Construction companies may be able to provide leftover building materials, such as lumber, plywood, boards, concrete blocks, bricks, wooden cable reels of different sizes, and concrete pipes. Other ideas for obtaining free and low-cost recycled building materials can be found here.
Rocks. State mining associations, quarries and stone yards, and state geologic agencies may be able to help with rocks and boulders for seats.
Seating. Local partners, such as parks, faith-based organizations, event planners, and rental companies, may be able to loan unused seating for temporary use.
Logs. Local arborists, tree-trimming services, contractors, utility companies, and municipal urban forestry departments may be able to provide stumps and logs.
Straw bales. Agricultural supply stores, farms, or your state’s market bulletin or department of agriculture may be able to help with straw bales.
Related Resources
Broda, H. W. (2011). Moving the classroom outdoors: Schoolyard enhanced learning in action. Stenhouse Publishers.
Danks, S. (2010). Asphalt to ecosystems: Design ideas for schoolyard transformation. New Village Press.
Hammerman, D. R., Hammerman, W. M., & Hammerman, E. L. (2001). Teaching in the outdoors. Interstate Publishers.
Moore, R. (2014). Nature play and learning places. Natural Learning Initiative and National Wildlife Federation.
Moore, R. C., & Wong, H. H. (1997). Natural learning: Creating environments for rediscovering nature’s way of teaching. MIG Communications.
Rivkin, M. (1999). The great outdoors: Restoring children’s right to play outside. National Association for the Education of Young Children.
Striniste, N. (2019). Creating comfort. In Nature play at home: Creating outdoor spaces that connect children to the natural world. Timber Press.
CREDITS
This article was written by Daniela Casanello, PhD, Ecoplan; Sharon Danks, MLA-MCP, Green Schoolyards America; Anna Harrison, ASID, LEED, AP, ALEP, Aedis Architects; Cindi Hron, MFA, MLA, Susquehanna Greenway Partnership; Arlene Marturano, PhD, South Carolina Garden-Based Learning Network; Michelle Mathis, MS, Learning Landscapes Design, LLC; Nancy Striniste, MPSLD, EarlySpace, LLC; Jane Tesner Kleiner, RLA, nature+play designs.
It was reviewed by Sarah Gill, MPP, and Christina Vassallo, MSN, FNP-BC.
National COVID-19 Outdoor Learning Initiative
The National COVID-19 Outdoor Learning Initiative supports schools and districts around the country in their efforts to reopen safely and equitably using outdoor spaces as strategic, cost-effective solutions to increase physical distancing capacity onsite and provide access to abundant fresh air. The Initiative seeks to equitably improve learning, mental and physical health, and happiness for children and adults using an affordable, time-tested outdoor approach to keeping schools open during a pandemic.